Clean Natural Eyebrows Tutorial
9:02 PMOne of the easiest and most efficient ways to change or enhance the structure of your face is to groom your eyebrows. The idea revolves around the simple idea of framing. In the same way that a nice frame can really make a photograph look classy, eyebrows do this not only to the eyes but the whole face. When we look at objects our eyes are naturally drawn to lines. As the strongest lines on someone's face, eyebrows are one of the most important features to consider.
There are many different types of eyebrows: thin, thick, shaved off, penciled in, sharp, soft, straight, arched... The key is to find which one naturally fits you. Different eyebrow shapes work better with different face shapes. My favorite shape is a natural arch with pretty full brows and tapered at the end.
When you've decided on a shape, the first step is to prepare your brows for action. Gather your ingredients:
*Vaseline (or any petroleum jelly)
*Clean tweezers
*Brow brush 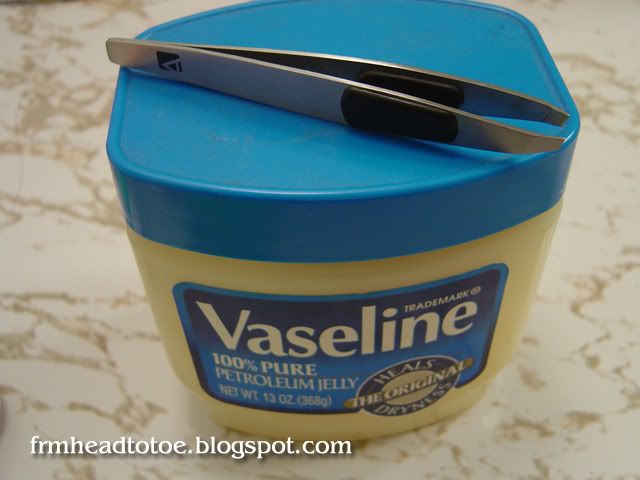
My tweezers are from Avon and they work fabulously, but you can also go high-end and buy Tweezerman tweezers. My only big recommendation is to get one that looks like this style, with the flat body and angled tip. I find that these are more precise and easy to use than other tweezers. If you break out from tweezing, disinfect your tweezers before you use them.
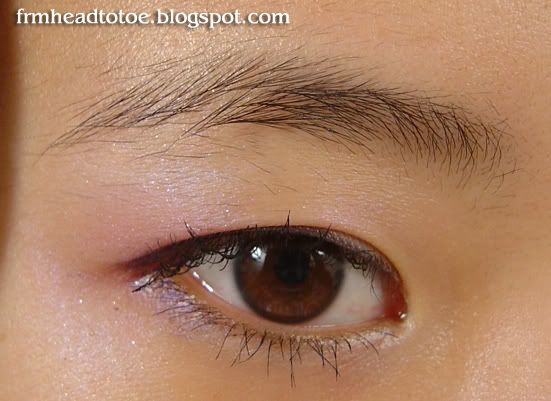
Here are my eyebrows pre-pluck. When I was asked to to a tutorial on brows, I decided to grow the beauties out to do a proper sweep of them. They are uneven and the stray hairs above and below seem to fade the brow out instead of creating a clean look. This is me looking worried about my brows.
Take a bit of vaseline and swipe it over the brow so that the hairs stick to your skin.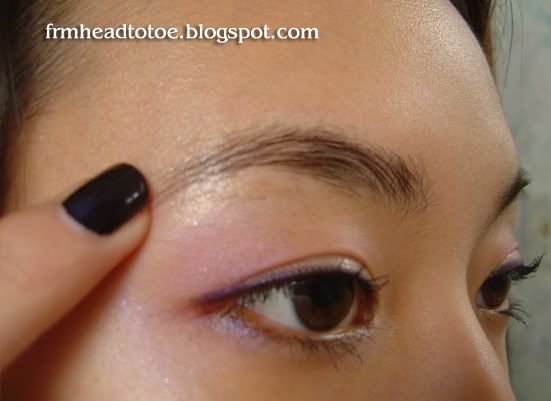
Next, take an eyebrow brush and brush the brows so that they are going in the desired direction. It helps if you brush everything upward and outward first, then just brushing down the longer strays and the arch.
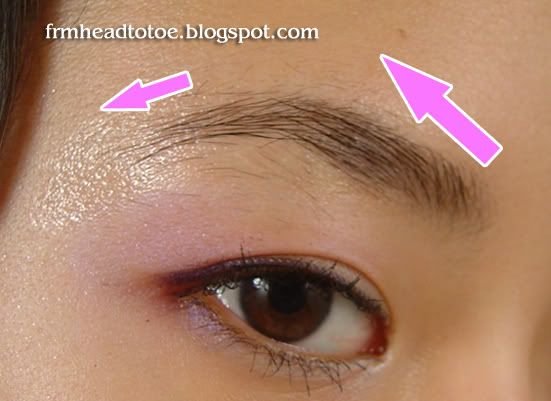
Ok, here is the key point. Take a ruler or nearby pencil and create a line from the edge of your nose to the tear duct to the brow. This should be your staring point you can mark this with a white eyeliner pencil if you think you will forget. Do the same again from your nose to pupil. This is where your arch should be. One more time, start at your nose to the edge of your eye. This is where your brow should end.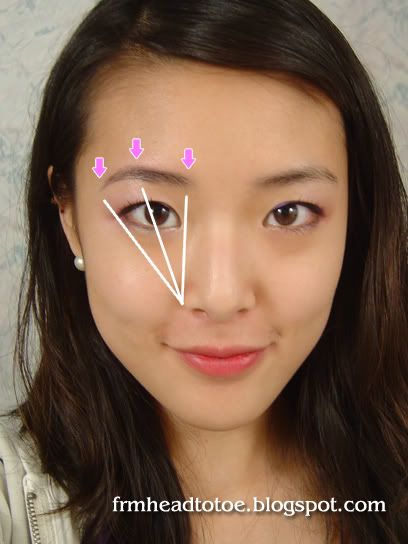 My preference is to have a straight brow from the inside to the arch, with a soft arch that tapers naturally. I also don't pluck the inner line because I prefer my natural rounded edge, but I drew it for the sake of the tutorial. Keep in mind that you can always tailor the look to you.
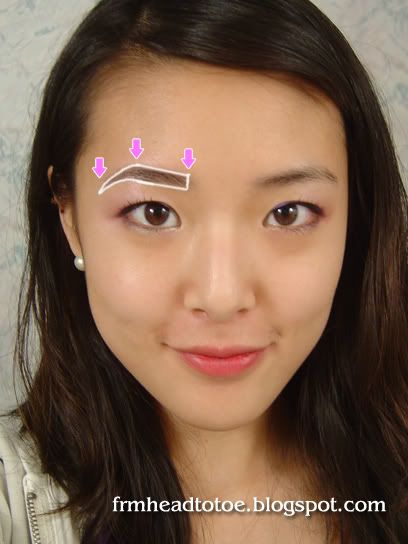
Now that you've got the shape, try to pluck the hair in the direction that it is growing in. It's not necessary to get every single baby hair, but do get the larger ones and any hairs that disrupt the line at the edge of the brows. Don't forget about any "grey areas" that might be from a patch of baby hairs. I get them near the top of my arch and I like to clean that up because it shows from speaking distance.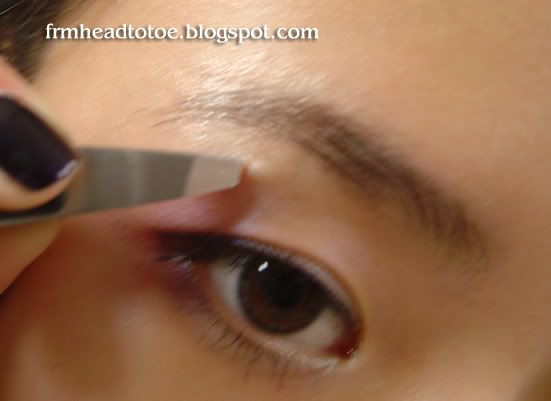
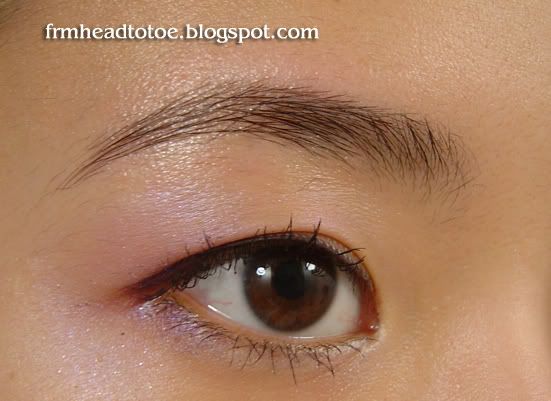
Tackling the other brow can be tricky, but as long as you keep taking a step back every so often, you can make sure they are being plucked evenly. It's okay to be dynamic here because your left and right brow may not grow exactly the same. Be picky and take your time. Here is the finished look. Clean brows, a brighter face, and better defined features.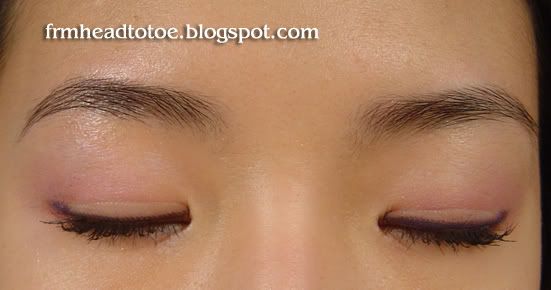

There are a few variations of this you can do. If you feel that plucking is too painful, buy some numbing product for teething babies and apply it on the brow before you pluck. Also, try plucking after a hot shower because your pores will be more open and it hurts less. You can also use lotion in place of vaseline if you don't have any on hand. Good luck, and feel free to leave comments of any more tips you may have to share.
PS- Guys, you are not exempt from plucking! Have one on hand for getting that unibrow and those under-eye strays. Nobody will know you plucked but your eyes will appear so much brighter. Onlookers will appreciate it.


18 comments
uhg, so pretty! I like this make up look on you too!
ReplyDeleteCan you write an entry about everyday mineral? You look flawless in it
Thanks so much for this tutorial.. love it =)
ReplyDeleteWow! Thanks for that tutorial!!!!!!!
ReplyDeleteYou're so pretty :) Keep blogging!
I have a question about the eyelid tape.. do you use it all day? and has it given you any irritations?
ReplyDeletedo you leave the vaseline on your brows all day so that the hairs stick flat against your skin?
ReplyDeleteThanks so much! Comments really make writing it all out worth it. You guys are so awesome.
ReplyDeletemegan: yeah, of course I can write one on EM. I love the company...I hate heavy makeup so it's great for a natural look!
anonymous 2: I do use the tape all day, and I'll cut tape or use eyelid glue at night. Sometimes it feels like it's cutting my eyes, but when it does that I take it immediately off. That happens at the end of the day, but not often.
anonymous 3: You can wash the vaseline off but I don't use much and I find that it helps keep the hairs in place similar to brow gel or clear mascara. Or you can just wipe it off with a tissue if it bugs you. It's really just to make the plucking go easier. :)
thanks for replying -anon2 :)
ReplyDeleteI love your blog, you are gorgous
ReplyDeleteIt's a great tutorial and your really very pretty! I was wondering do you use anything to color in your eyebrows like powder or pencil? And what kind do you think is best to use?
ReplyDeleteI'm so happy to have read your post on this topic! I've read a few others who've had similar advice, but it wasn't very helpful because they have really full eyebrows to work with! Mine used to grow out a lot, but in the wrong places so that it's actually quite sparse. Totally didn't realize that until I started plucking and attempting to arch it. Ended up it looked like I had half eyebrows or something.:\ Didn't think to use vaseline or lotion.
ReplyDeleteVery helpful, thanks for writing it! And I realize this is a very old post, but appreciate it so much anyway.:)
thanks for the tutorial. worked great for me. i hope you keep writing the awesome blog; happy holidays!
ReplyDeleteLove this tutorial! I finally got the jist of tweezing my eyebrows. I use to be scared that it'd come out scary or weird, but I followed your instructions and got perfected brows that look natural. Thanks a bunch!
ReplyDeleteI'm glad that I've read your post.. cause I'm having troubles with my eyebrows... >_< it's thick and messy... and I dunno what to do with it... T.T
ReplyDeletethanks again...
Thanks for the detailed advice. When I was a teenager I had really messy eyebrows. So I know how hard is to fix them. After all nobody likes ugly eyebrows.
ReplyDeleteI'm obsessed about my eyebrows cz they don't have nice shape and this tutorial really really helps!!! Tnx a bunch Jen..
ReplyDeleteHi Jen~! I love reading your blogs~! I wish my eyebrows can look full like yours. I LOVE YOUR EYEBROWS! *^__^* Want to trade? I've been trying to grow them out for awhile but no luck so far. I've tried using Anastasia eyebrow serum but that hasn't helped at all. Any solutions? *(O.o) Any answer would be very helpful~ You are beautiful in every way...keep up the good work...you are truly an inspiration to all of us~! God bless you! *^__^*
ReplyDeleteA natural eyebrow tutorial with tweezers? I think you're confused.
ReplyDeleteUmm, the before looks a whole lot better than the after.
ReplyDeleteHowever, the after isn't bad though. It's a lot better than the majority of females out there who look so odd and weird.
And for guys, I agree with the unibrow, but doing way more than that isn't needed or wanted. By wanted, I mean, only a female who thinks their plucked up brows look hot and sexy are the ones who would notice a guys unplucked brow. The majority of females will not care.
I would never want my fiancee to pluck her brows up.
Then again, hers is similar to your before, which is amazing.
It is almost hard to find a woman that hasn't ruined her brows.
But, you do have nice brows from the start that doesn't need plucking.